Pre-order setup
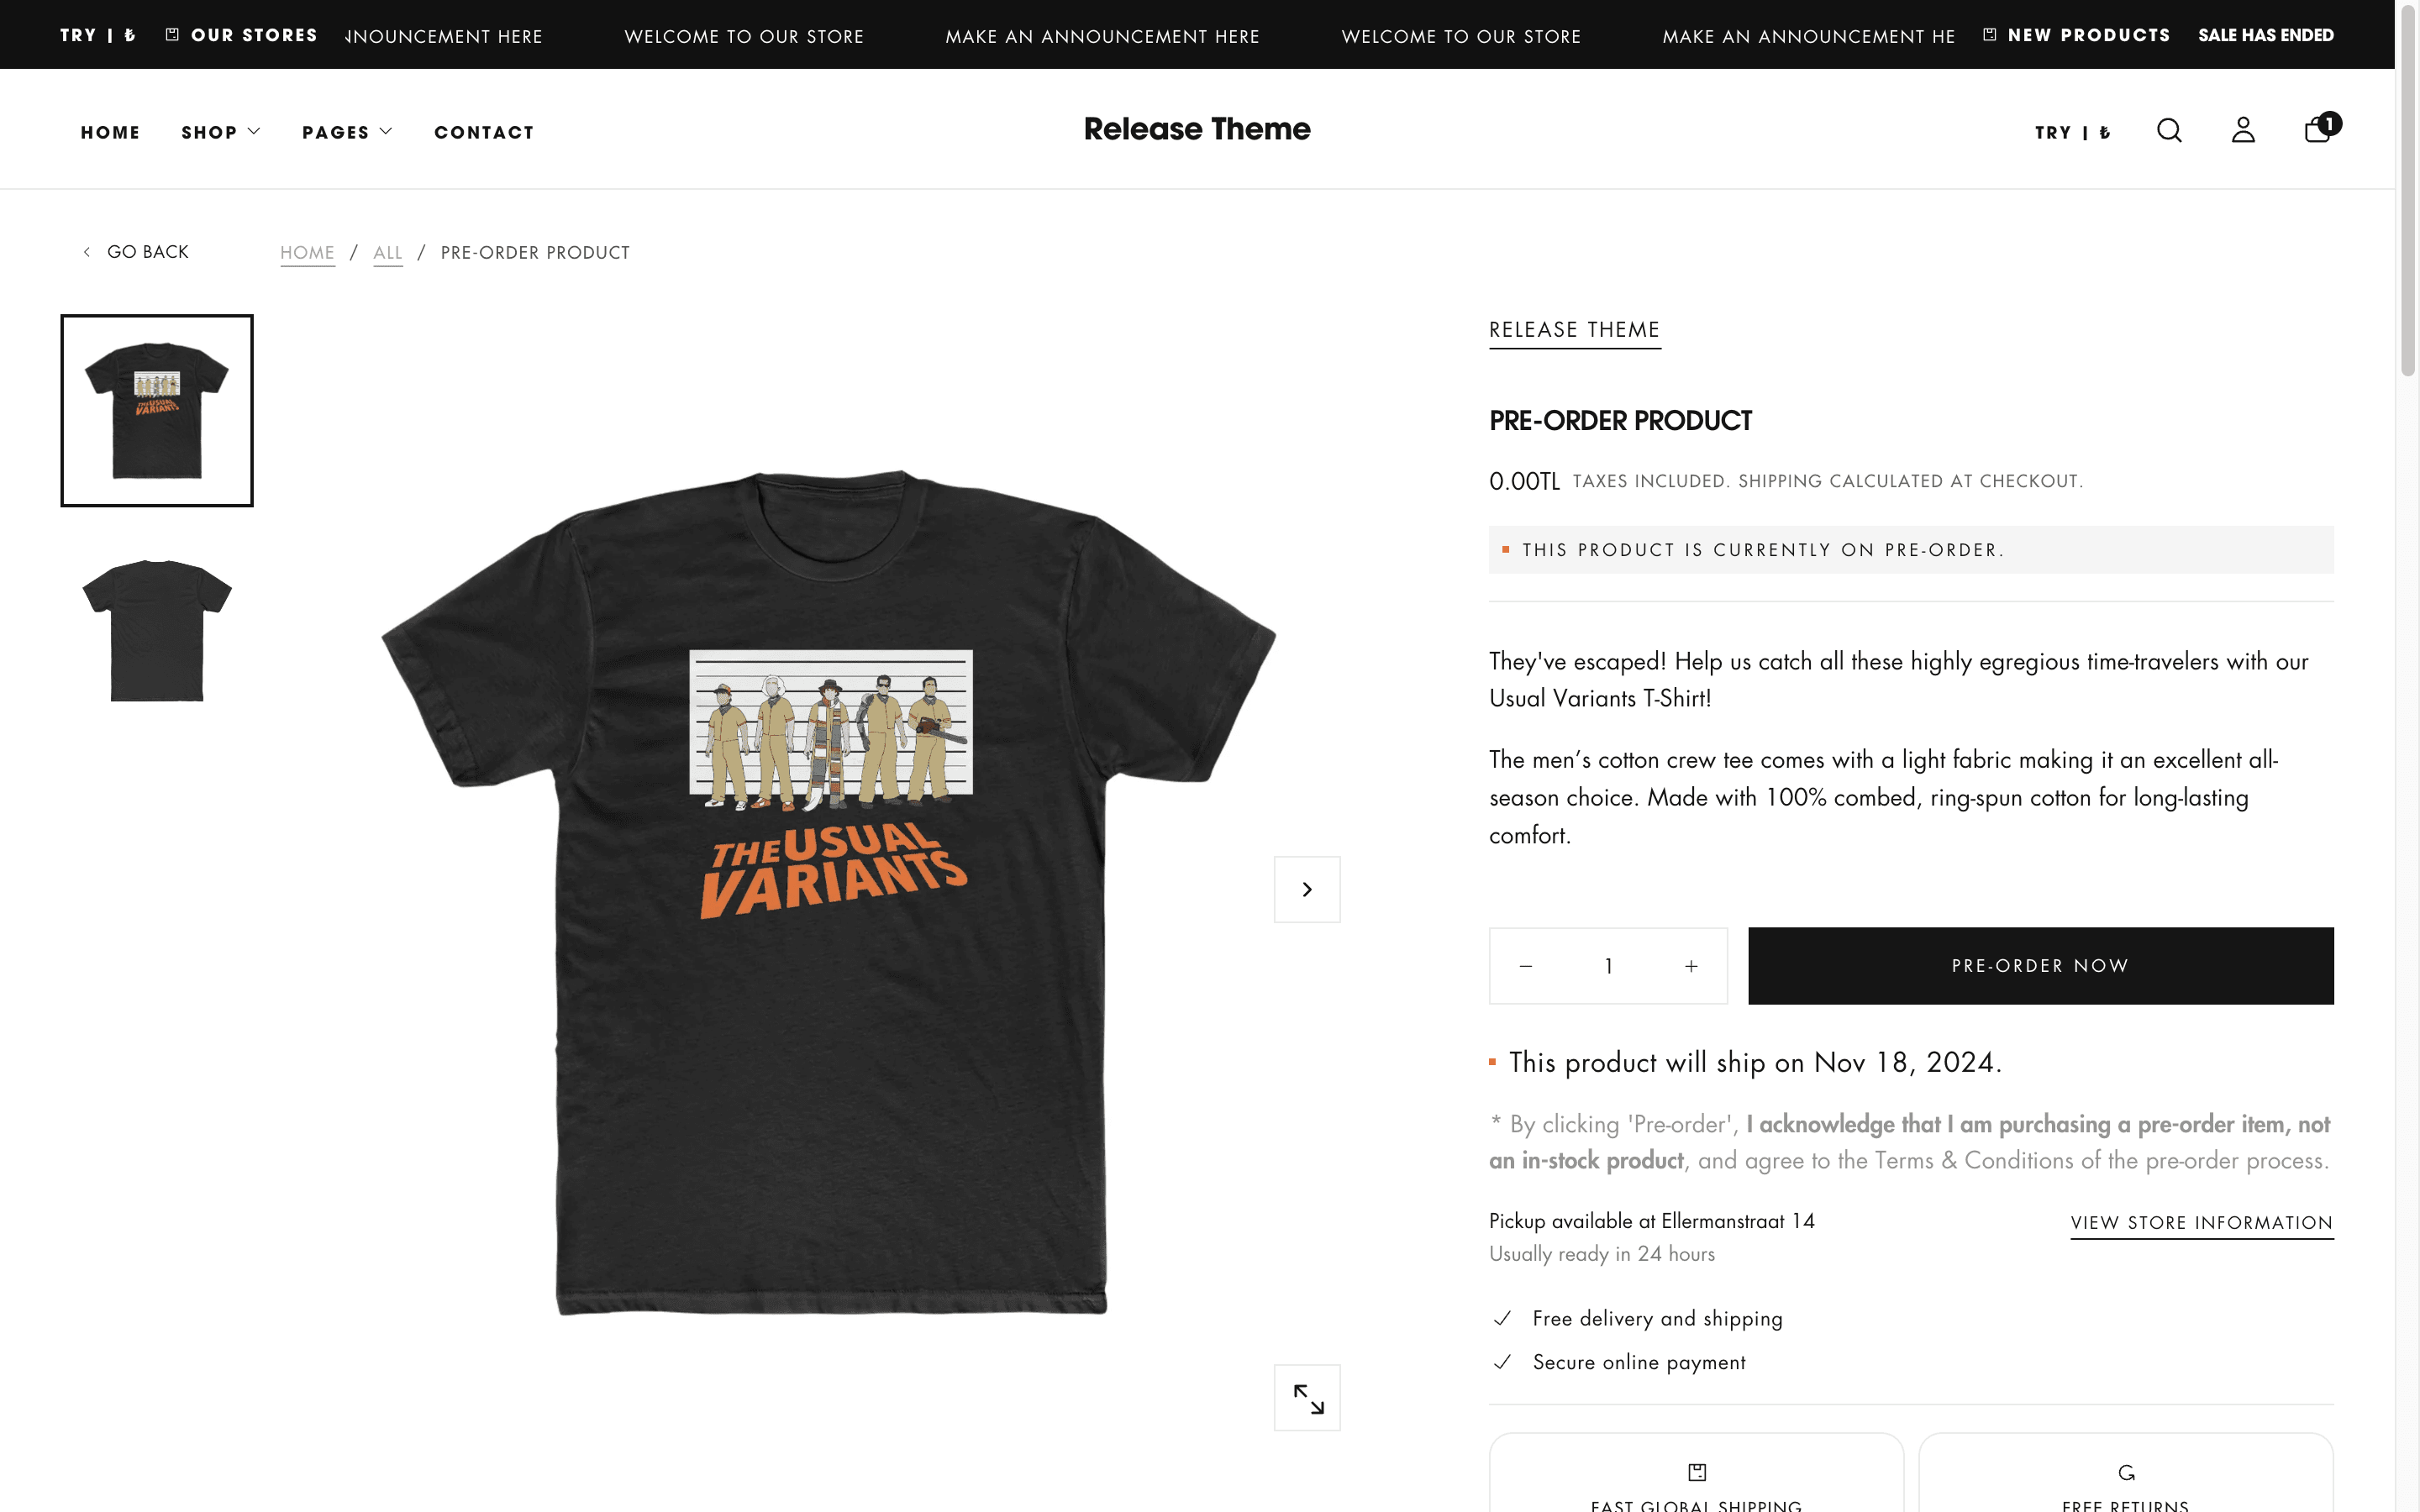
About:
This documentation presents the step-by-step process on how to enable and set up the pre-order functionality within Release starting with version 1.0.8
Overview:
In order to activate the pre-order functionality inside Release, you'll have to create two new product metafields:
Preorder: A "True or False" type product metafield.
Preorder shipping date: "Date" type product metafield.
Note: This is optional, but can be used to show the ETA of the product's arrival.
How to do it:
Step 1:
Go to the store's Settings > Custom Data > Metafield definitions > Products > Add definition
Step 2:
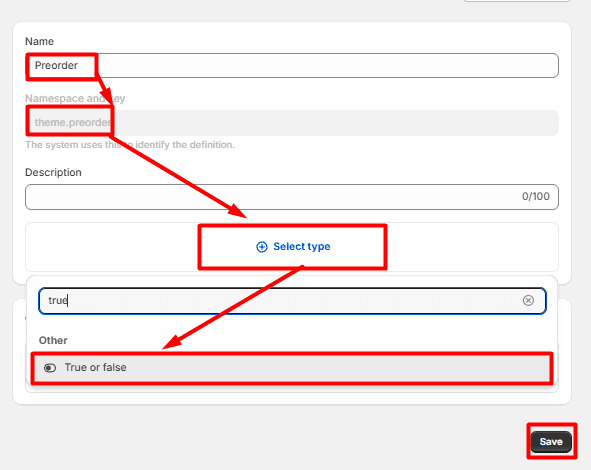
Enter the following values in order to create the preorder metafield:
Name: Preorder
Namespace and key: theme.preorder
Select type: True or false
Save
Step 3 (Optional)
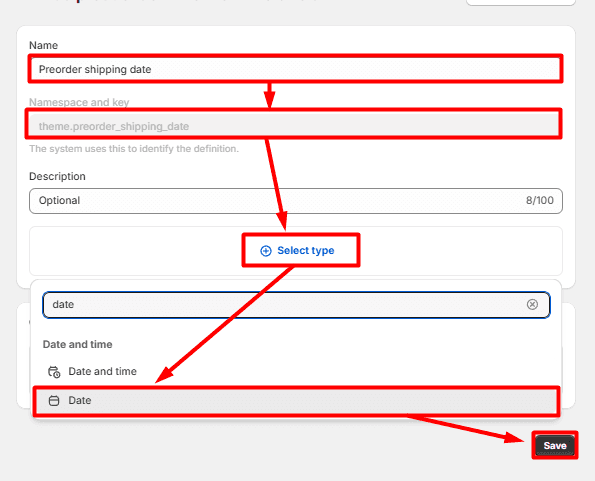
Add a new definition with the following:
Name: Preorder shipping date
Namespace and key: theme.preorder_shipping_date
Select type: Date
Save
Step 4:
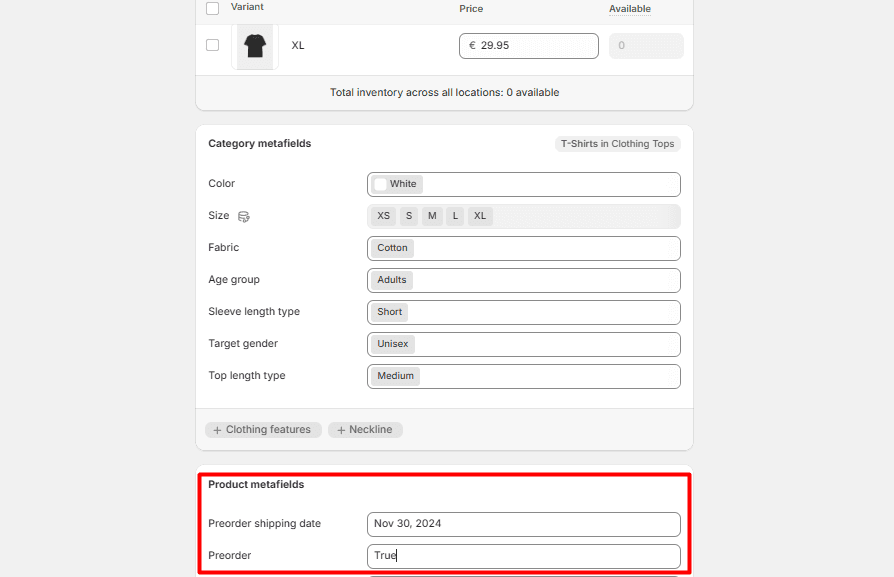
Go to the backend of the product you want to have as preorder and scroll down to Metafields > Preorder
Click on the preorder box and select "True"
Save
Step 5 (Optional):
If you've set up the preorder shipping date metafield as well, you can set it up in the product's backend Metafields > Preorder shipping date
Select the date when it can be shipped on
Save
Step 6:
Access the product inside the theme and confirm the functionality of the feature.
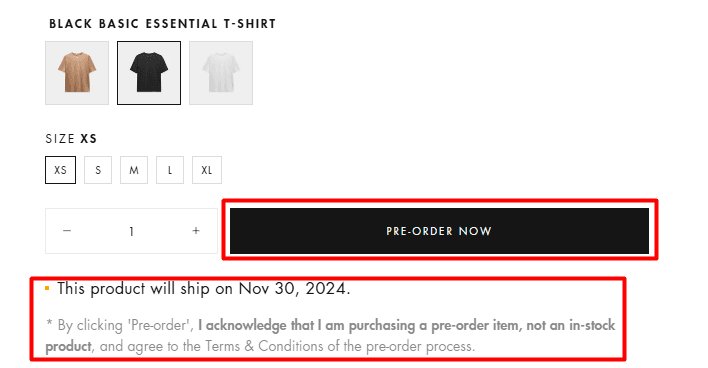
Note: The product's "Add to cart" button will appear as "Pre-order now".
Additionally, you'll have the following fields:
This product is currently on pre-order
This product will ship on {{date}}.
By clicking 'Pre-order', I acknowledge that I am purchasing a pre-order item, not an in-stock product, and agree to the Terms & Conditions of the pre-order process.
How to edit the fields appearing on the product's page:
Step 1:
Go to Online store > Themes Library > Click on the 3 dots next to your theme > Edit default theme content
Step 2:
Use the search functionality in the default theme content to search for "pre-order"

Step 3:
Modify the text as per your liking and then hit "Save".
Contact UsWas this article helpful?
Have more questions? Submit a request